Welcome to the oddity shop that is my brain. Here you can learn all about techniques, how to impress guests, and read my reviews on various products.

All About Bitters
Everything you need to know about bitters
I feel like the word “bitter” gets a bad wrap. It is usually used as a negative description for foods and drinks, but in reality bitterness is an important aspect of creating balanced and complex flavour profiles. There are six different types of tastes we experience: bitter, sweet, salty, fatty, umami, and sour. You want a balanced combination of these flavours, not necessarily all of them at once, but you don’t want a cocktail that tastes flat and one dimensional. I find bitters are a fantastic way to balance cocktails and add more complex flavours without the addition of more spirits or more liquid which could lead to other problems with the cocktail such as dilution or tasting too alcoholic. At the same time, I understand that the world of bitters can be very overwhelming. There are so many types, flavours, and brands to sift through and it can be hard when you’re just learning. I am a little obsessed with bitters and have quite the collection at this point so I want to try and break down what bitters are, how they are used, and give you a bit of a starting off point for what I consider to be staple bitters for any home bar.
Bitters themselves have been around in many forms since Ancient Egyptian times when Egyptians would steep botanicals in wine.The bitters we know today came about in the Middle Ages when we started figuring out how to distill higher proof alcohol which was a better base for steeping and preserving botanicals. However, bitters gained in popularity in the 18th and 19th centuries; these bitters were not made for cocktails,they were patented and sold as medicinal tonics to aid in digestion, reduce nausea, and to cure hangovers. During this time they were also used to flavour less than savory wines, gins, brandy, and vermouths. That was more of a side use than it was their designated purpose. This is where we start seeing the transition from medicinal bitters to cocktail bitters. Cocktail bitters were more focused on flavour than medicinal properties. This is when you start to see companies that we know today start producing bitters such as Agnostura, Peychaud’s, and Bittermens. You can still find these bitters on most bars but the world of bitters has expanded beyond just “aromatic” bitters and there are so many different flavour profiles available now.
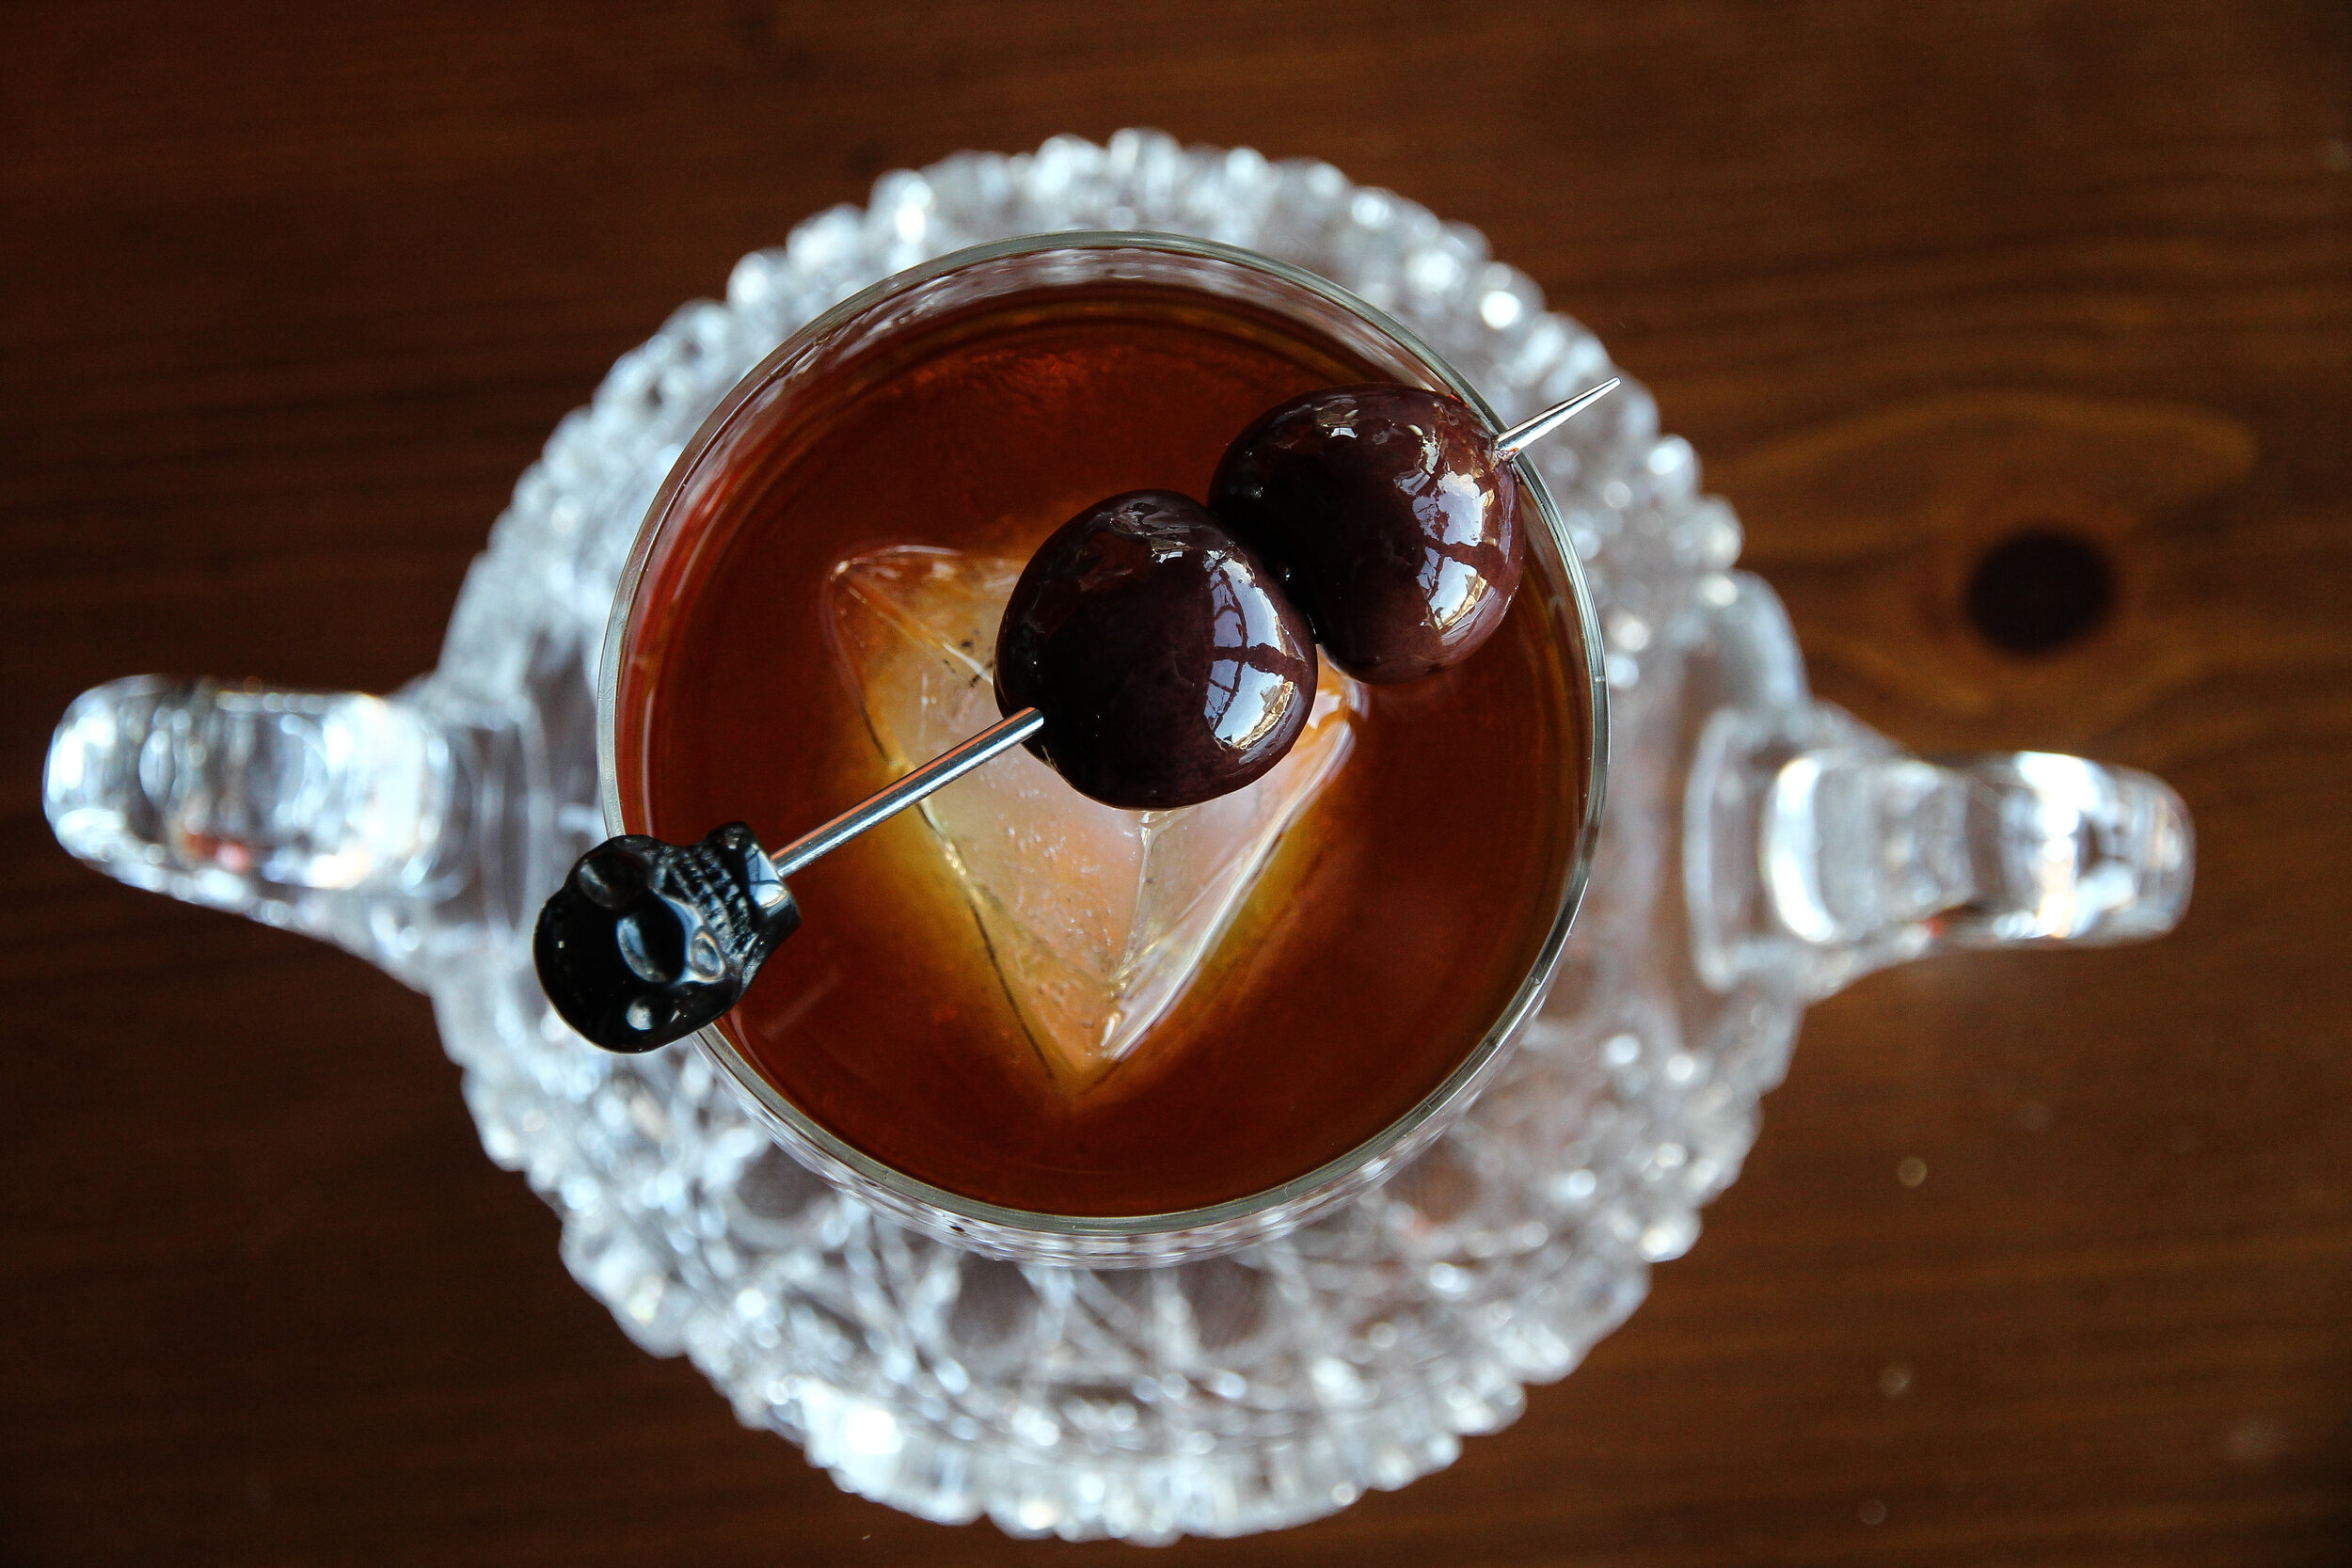
Enough about what bitters are and their history, let's talk cocktails! The cocktails that most people think of when they think bitters are usually the Old Fashion, Manhattan, Whisky Sour, and Pisco Sour. Bitters are so much more diverse and can be added to any cocktail, or if you’re looking for a non-alcoholic option they can be added to soda water. It all comes down to flavour profile and what you are looking for from your drink. How to actually use bitters depends once again on your drink; for the Pisco Sour the bitters are used more as a garnish and are carefully dropped on top of the foam. For Old Fashion, they are dropped on to a sugar cube and muddled then topped off with whisky. For Manhattans and Whisky Sours the bitters are incorporated directly into the drink.
No matter how you use bitters the most important thing to remember is they are extremely potent! A few drops go a long way. To get an idea of how strong your bitters are I always suggest putting a drop on your hand or spoon and trying them straight before you even go near a cocktail. A: This gives you a really good idea of how potent the bitters are because not all bitters are created equal, so some will be very mild and you will need quite a few drops and for others two drops will be more than enough. B: Trying them straight also allows you to truly understand the flavour profile of your bitters which in turn will help you in creating your cocktails. Once you have an idea of how strong your bitters are you can start looking at either playing around with your own cocktail recipes or trying out a few recipes that have piqued your interest. As for actually reading a recipe, you will notice there are usually two forms of measurements used for bitters, either drops or dashes. Now you may think I am ridiculous to bring this up but in some cases it really does make a difference. The majority of bitters will have one of two types of droppers, the first is just a flat top that regulates how fast the bitters come out, the second is a little glass dropper attached to the lid. So drops are exactly what you expect, individual drops of bitters, both types of bottles allow for drops so this is the easiest and most accurate measurement. Oftentimes you will see “a dash of bitters”, so what exactly is the difference? A dash is used for bottles that don’t have the glass dropper and is when you give the bottle a hard shake upside down instead of letting it just drip. A dash of bitters is equivalent to about 6-8 drops, which is why it is important to make that distinction between a dash and a drop and is not something I see people talk about.
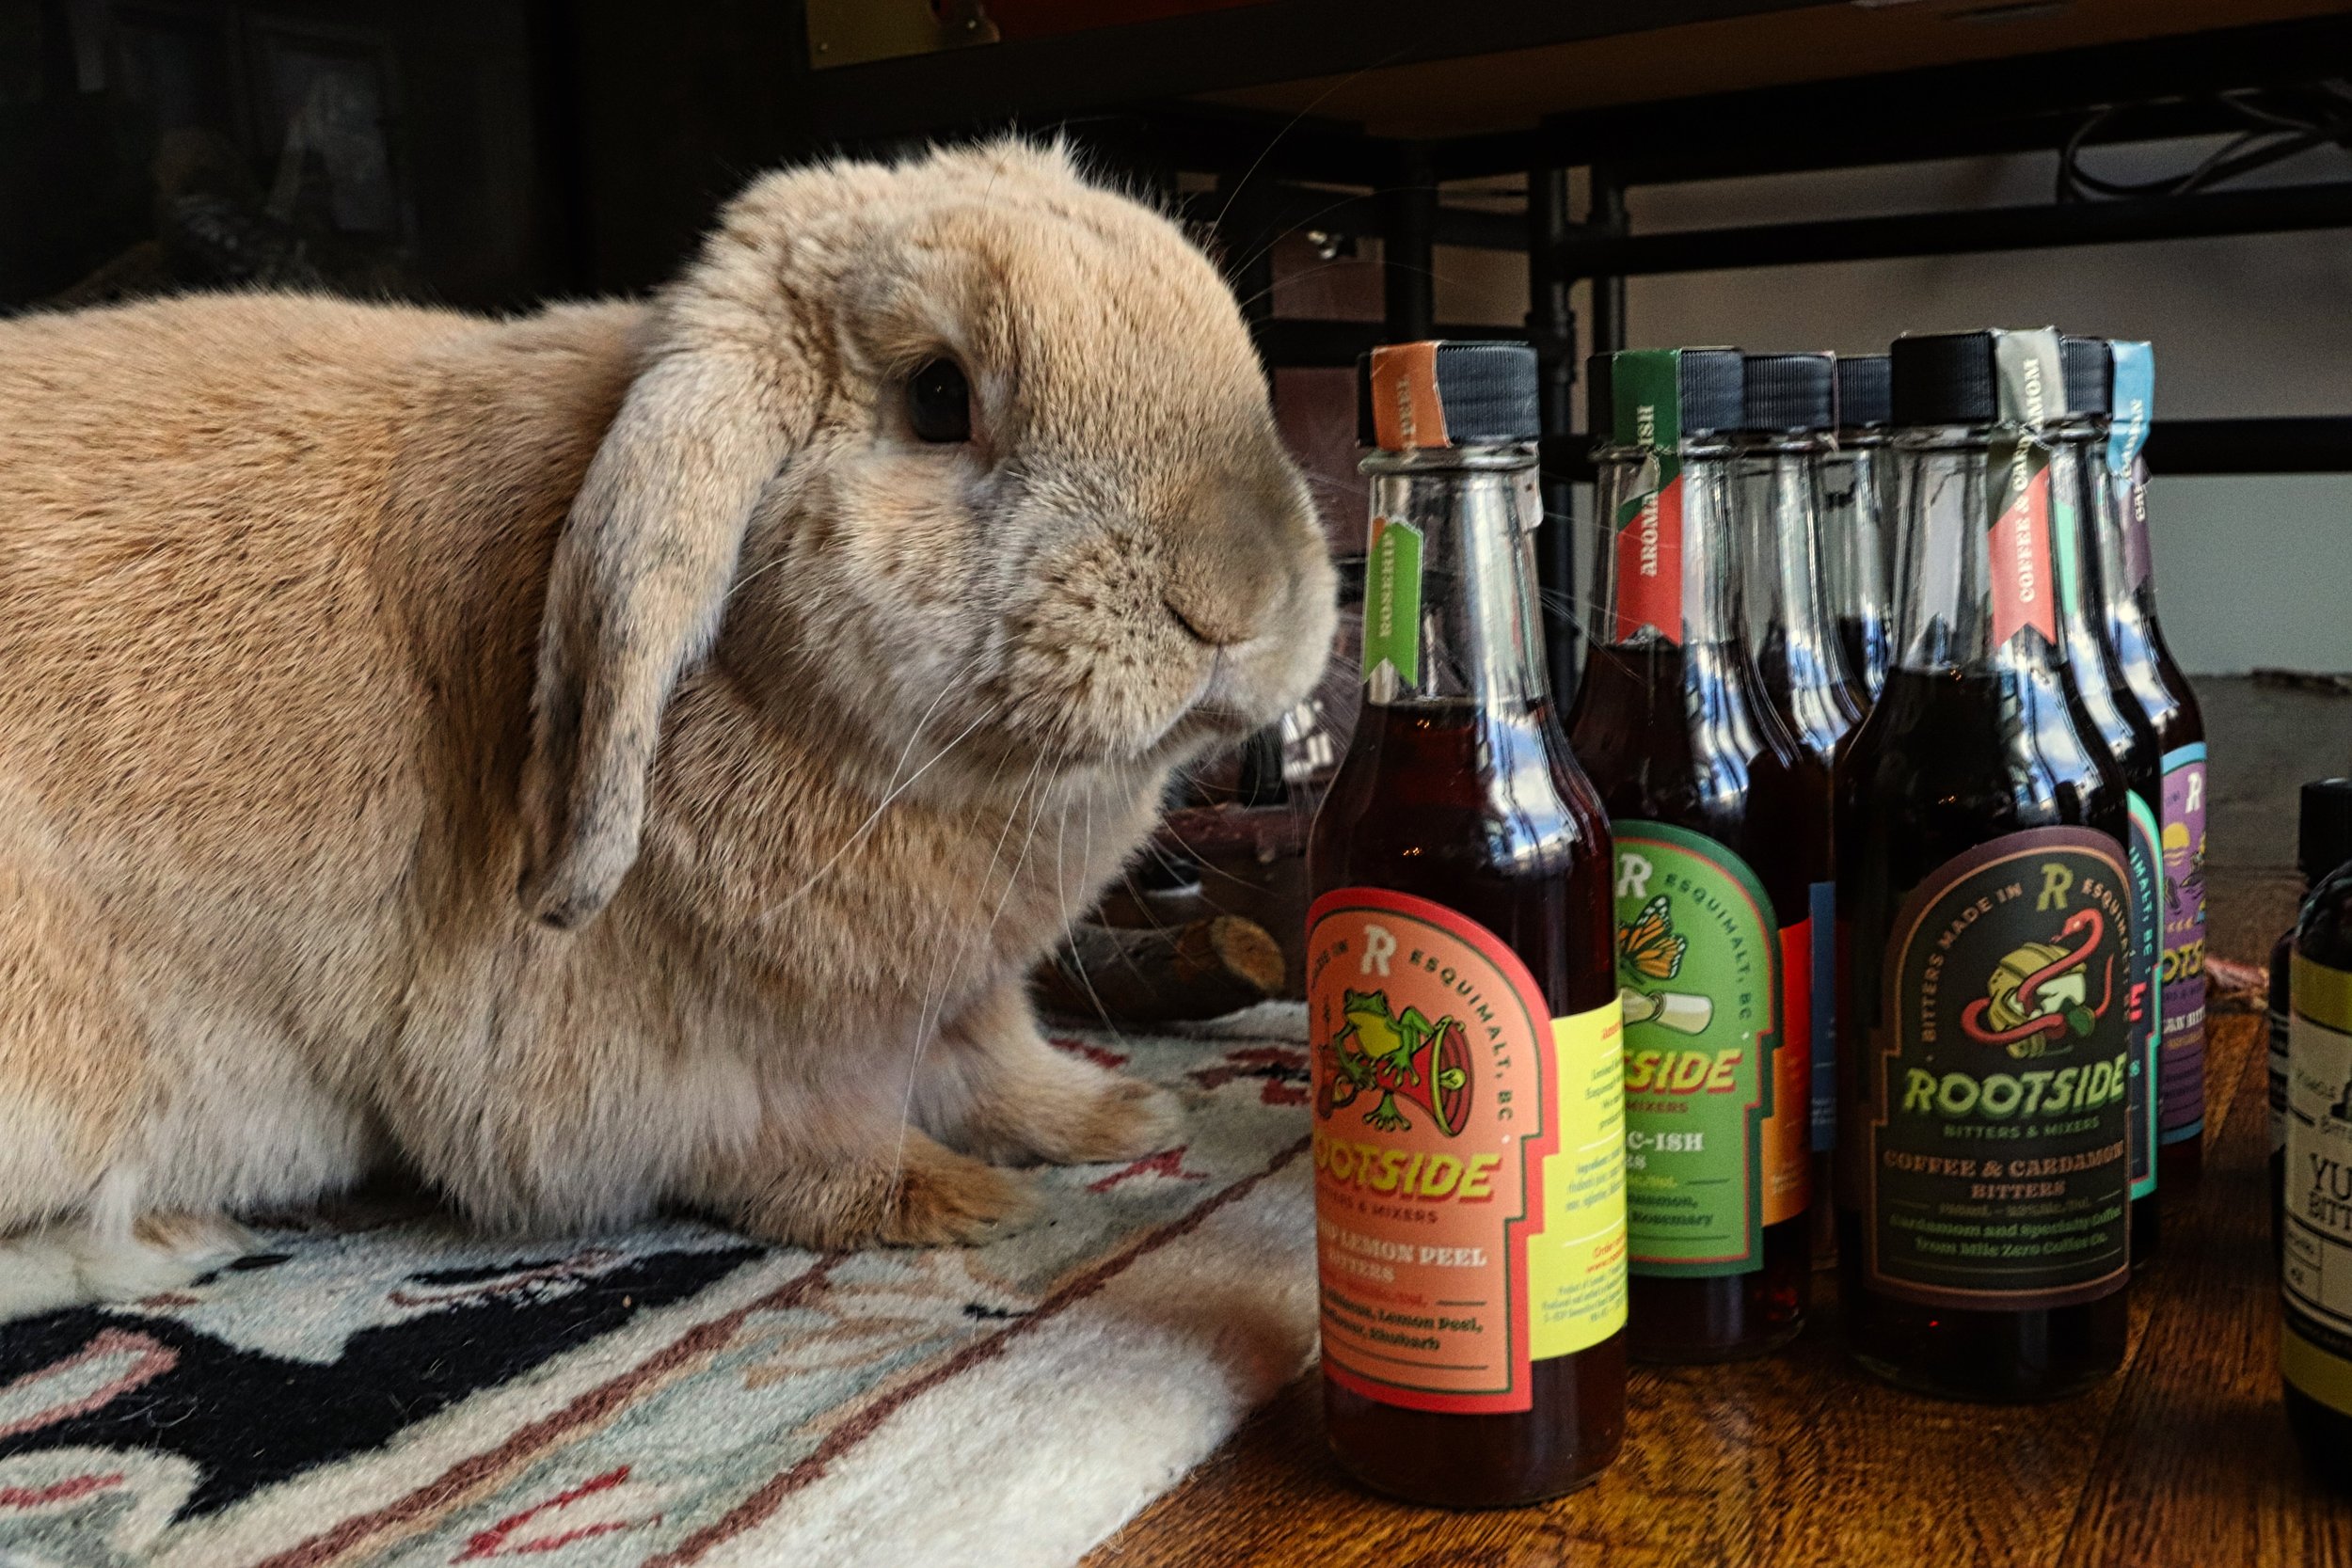
Now, where do you actually start with bitters? Bitters are not the cheapest ingredient (although a bottle will last AGES) so I recommend starting off with the basics. The absolute must have bitter is what is considered an “aromatic bitter” ; these don’t necessarily have a specific flavour profile but are more of a symphony of different flavours. Each type of aromatic bitter will taste different so it is up to personal preference. This is a controversial opinion but I don’t like Angostura bitters. My go to aromatic bitters are Rootside’s Aromatic-ish which is warm and spicy,with prominent notes of star anise, cloves, and cinnamon. My other most used is General Ambrose’s Aromatic Bitters from Apothecary Bitters. These have a darker, richer flavour of molasses, stewed fruits, with a bit of a woodsy note. Then you want a citrusy bitter; this is again based on personal preference, you can get orange which is the most traditional option and the one you will see most often in cocktails. I really enjoy both Rootside’s and the Fee Brother’s orange bitters. There is also the option of grapefruit or lemon bitters too which are less common but if you prefer those flavours over orange live your best life and use them instead. Ms. Better’s Bitters has a fantastic grapefruit bitter same with Scrappy’s. For Lemon bitters Rootside just released a lemon tonic bitter which I have not tried but based on the fact I own all their other bitters I am willing to put money on this one being phenomenal as well! Another flavour of bitters I suggest having on hand is chocolate because when can you ever go wrong with chocolate? I love Scrappy’s for just a solid chocolate bitter but if you want more than just chocolate Apothecary Bitters has “The Darkness” which is a chocolate and coffee bitter which is delicious. Those are what I consider the basic bitters that every bartender should have, from here it is up to you what you add next. I suggest having a tropical one and a fruity one, Ms.Betters Bitters Pineapple Star Anise is my absolute go-to for tropical and I love Bittered Sling’s Clingstone Peach bitters for fruity.
Here’s a list of my other most used bitters if you’re looking for other recommendations:
Molè bitters from Dillon’s (Spicy Chocolate)
Kpynhik (Krupnik) from Bittermans
Coffee & Cardamom from Rootside (actually let's be honest here, literally everything Rootside makes is fantastic and I highly recommend them as a whole)
Tomato Vine from Mad Lab
Basil Affinity from Born to Shake
Yuzu Bitters from Miracle Mile
Now that you know more about bitters and how to use them, Happy Cocktailing!


Gin as Explained by Your Local Gin Granny

Although gin is one of the most popular spirits these days, especially considering all the craft gins that are available, I still find it can have a bad reputation. I’ve heard gin be described as “liquid pinecone death”, “someone ruining a perfectly good vodka”, “like an orphan crying into a Christmas tree”, and “just downright awful”. Not rave reviews in my opinion and I think gin deserves better. It may be because gin was my first love when it came to spirits, or maybe my palate is just more suited to the flavours in gin, both are possible. I also understand that for some people gin has never been and will never be something that they enjoy drinking, but I am of the firm belief that you need to try something over your life as your palate changes. You never know, maybe one day you will find a gin you absolutely love, and your life will change.
First things first, what can be classified as a gin? In Europe a gin has to be above 37.5% ABV and in America it has to be above 40% ABV. A gin also must contain juniper, other than those two stipulations the category of gin is very forgiving. I think that is why it lends itself to craft distilling so well, with gin, distillers are given more opportunity to experiment with both flavour profiles and local ingredients. This in turn allows there to be far more variation in the gins that are available. There are a few more specific categories under the umbrella of gin, these categories include London Dry, Old Tom, Genever, Sloe Gin, West Coast, and what I would describe as a contemporary gin. Here I am going to give you an overview of each category as well as a few examples of gins that would fit in these categories. I am mostly familiar with British Columbia’s craft spirits because I work in the industry here, but I will try to include some other more accessible gins too!
London Dry
London dry is the most common type of gin and the one that most people are familiar with, these gins are made with a very clean and neutral base spirit and there is no sugar added to them. These gins must be redistilled after the botanicals are added and nothing can be added after the final distillation process. All botanicals must be natural, and no additional colours or flavours can be added to the gin. The most prominent flavour is always juniper, usually followed by coriander or citrus notes.
Wallflower Gin- Odd Society
This gin is truly a beautiful representation of London dry gin, it has notes of juniper up front but evolve into notes of rose petals, citrus, and ends on a slight peppery note. It is a very complex and aromatic gin perfect for gin and tonics or any other cocktails because it is flavourful enough to not be overpowered in a cocktail but light enough to pair with more delicate flavours.
Beefeater Gin
Beefeater gin is one of the most well-known names when it comes to gin and there is defiantly a reason for it. This gin has been distilled in London since 1863 with very few changes in the recipe since then, if it ain’t broke don’t fix it and all that. This gin starts with the distinct taste of juniper on your palate along with some spicier notes, this then changes into a citrus and floral bouquet. This is quite a dry gin making it perfect for a classic martini.
Old Tom
The next type of gin on my hit list is Old Tom gin. Old Tom gin is one of the oldest surviving types of gin from 18th century London and can usually be recognized by its rich amber tones. This type of gin is not regulated in the sense that there are no specific rules you must follow to declare it an old tom gin. These gins tend to be on the sweeter side due to either the choice of botanicals or the addition of a sweetener. These gins are often barrel aged which I find also results in a sweeter feeling end product because of the notes imparted during the barrel aging process. That being said these gins do not have to be barrel aged and can in fact just have sweetener added to them instead. The flavour profile of these gins tends to be warmer and spicier with characteristics of vanilla, oak, orange peel, cinnamon, and caramel.
Old Tom Gin – Hayman’s
This is one of the Old Tom gins that has not been barrel aged and instead has just been sweetened with sugar after the botanicals have steeped in the spirit. Although this gin has not been barrel aged there are notes of cinnamon and orange peel throughout, as well as a slight licorice note along with the expected juniper. As far as Old Tom gins go, I feel like this is a very good representation of what old tom gin would have been like during the time of gin palaces in London.
Bourbon Barrel Aged Gin – Long Table
This gin is aged in ex-bourbon barrels which gives it a beautiful honey glow as well as imparts flavours of cinnamon, vanilla, caramel, and cloves into the spirit. Along with notes of baking spices you will find flavours of juniper, orange peel, and a slight pepperiness in this gin. This gin is beautiful just to sip on the rocks or in an old fashion style drink with spiced bitters, a cube of sugar, and a twist of orange peel.
Sloe Gin
Sloe gin is an interesting product because it is not necessarily a gin, it is classified as a sloe berry and gin-based liqueur that is usually around 25% ABV. Due to the lower alcohol content and the addition of both sugar and sloe berries after the final distillation process it cannot legally be considered a gin. However, I do believe this liqueur played an important part in the evolution of gin. Sloe gin came about during the 18th century gin craze in London when gin was particularly strong, unregulated, and overall questionable, it was often referred to as bathtub gin during this time. Lower class people would often pick sloe berries which were the by product of black thorn bushes used as fencing around large houses and properties, on their own these berries are very bitter and not something you would want to eat on their own. However, it was soon realized that they could be added to gin along with a bit of sugar if they could afford it and let it infuse. This was a very common drink during the winter especially around Christmas time. Sloe gin is a very sweet liqueur with a tart bite and flavours of cranberries, dried fruit, peppercorns, and juniper.
Sloe Gin – Sipsmith
This gin is less sweet than the majority of sloe gins that you will find on the market which is why I like it so much. It is full of robust fruit flavours and without the extra sugar you can really appreciate them, you get notes of pepper, red currants, cassis, and cherries throughout, the ending notes are of rich dried fruits and sweetness balanced with an nice tart bite.
Sloe Gin – DeVine
This sloe gin is the only one that is being produced in Canada and is a different take on the classic sloe gin because it is completely unsweetened. Due to the fact that there is no sweetness in this gin it gives you more room to play with cocktails because you don’t have to worry about making them too sweet. The flavours of this gin are very peppery and rich, you get notes of peppercorns and cranberry upfront followed by stewed plums and cherries. The final notes on your palate are black currents and pepper along with a slight tartness.
West Coast Gin
West Coast style gin is something that I’ve notice pop up here in BC in the last five or so years. I don’t know if this style extends beyond BC, but I thought it would be interesting to include here to show how gin has evolved over the years. These gins are made with a particular interest in local and sustainable harvesting practices, these botanicals are often harvested by hand either by the distillery itself or by a local company. These gins often have flavours of cedar, lavender, rose, kelp, and juniper. These gins usually tend towards more herbal or coniferous flavour profiles instead of citrus or floral dominant profiles.
Old Growth Cedar Gin – Tofino
This gin is very unique and does a very good job of representing what it means to be a west coast gin. This gin is made with the same botanicals as their west coast gin with one very important addition, Western Red Cedar Tips, this addition brings the gin to a completely new level! It is very earthy up front with notes of woods, tree sap, and juniper, followed closely by bright citrus notes and a slight floral undertone. This gin goes perfectly in a gin and tonic or a more savoury style cocktail.
Unruly Gin – Wayward
Wayward Distillery is BC’s first honey-based distillery which gives their gin a very unique aspect, this gin is lighter than your average gin but absolutely does not compromise on flavour. This gin only has six botanicals, so you get to appreciate each and every flavour without them competing. The notes of juniper are lighter in this gin which makes it more floral in nature this is also partly to do with the base of honey. You get notes of lavender and coriander up front, followed by lemon and grapefruit, the finish is where the juniper and young cedar tips peak through leaving you with a long-lasting flavour on your palate. This gin is delicious just on the rocks or in a lighter more floral cocktail.
Contemporary Gin
Last up is contemporary gins, this is less of a defined category and more of a catch all for gins that don’t quite fit into one of the other categories. These are the gins that have botanicals added to them after the final distillation, have added colours or flavours, or just have some form of unique attribute. For example, Hendricks gin, although this gin has been around for ages would technically fall into this category because cucumber is added after the final distillation. Or the latest craze of colour shifting gin, whether it is empress gin, Arbutus Blue Gin, or Okanagan Spirits Evolve Gin, each has botanicals added after distillation which results in the magnificent indigo colour that morphs into pink when met with an acid.
Hendrick’s Gin
Hendrick’s gin is best known for being infused with cucumber after the final distillation which gives it a very unique flavour profile. The first note you get is is very herbal and refreshing this is predominantly from the cucumber, it is then followed with floral notes of rose and lavender, next is citrus, the finishing notes are again very vegetal and refreshing. The finish on this gin is quite long and is definitely one of my go to gins in the summer because it is so bright and refreshing, just muddle it with a bit of mint and cucumber on ice and top with tonic and you’re good to go.
Kazuki Gin – Sheringham’s
Sheringham’s is most well known for their seaside gin which won gold in the contemporary gin category a few years ago, however, I think their Kazuki gin is woefully overlooked. This gin is entirely unique with cherry blossoms, green tea, and yuzu as just a few of the botanicals. It is beautifully delicate and floral without tasting like perfume, there are slight vegetal notes from the green tea followed by bright citrus, the finishing notes are soft florals and bright citrus. All the botanicals in this gin work so well together and do not compete or over power each other.
Genever or Jenever
Genever is the mother of all gin and originally developed in Holland. If these gins are made traditionally, they will be made from a base of barley distillate or grain wine. Barley gives these gins a very distinct sweetness as barley has more complex sugars than other grains, this sweetness plays nicely with all the botanicals that are featured. The most important ingredient in genever, like all other gins, is juniper but genever is known for its more complex flavour profile. This is because the process of making genever includes many more botanicals than would be found in a London dry style gin, obviously these botanicals depend on availability, local terroir, and distiller’s preference. However, the most common botanicals are orris root, angelica root, rosehips, licorice, dandelion root, chamomile, lavender, caraway, mug wort, wormwood, and Saint John’s wort. Genever’s are very herbal in flavour profile and are made in various aged formats, you can get unaged, slightly aged, or very aged Genever. Unaged Genever has notes of juniper, mugwort, licorice, and citrus, these profiles will change based on how long they are aged and what kind of barrel it is aged in.
Genever - DeVine
This genever was my first experience with genever and is still my absolute favourite. The palate of the genever is very smooth with a delicate sweetness from the malted barely, for me this genever very much reminds me of a more delicate and reserved absinthe. I find this is a good gin to start on if you don’t like the “pine needle” taste of other gins because juniper takes a back seat here, so you are able to appreciate the more delicate botanicals used. The finish on this gin is a long one, you can taste it well after you have finished taking a sip. I think I also love this genever so much because it is a very versatile gin, I have used it in everything from light floral cocktails, to Caesars, to very alcoholic drinks and it always shines through without overpowering the other flavours. I also highly recommend trying their “Dutch Courage”, they have barrel aged their classic genever in Ancient Grains Alternative Whisky casks. I would try to explain the flavour profile but nothing I say will give it justice so you will just have to try it for yourself.
Old Genever – Compass
This genever is produced in Nova Scotia and is made with a distillate consisting of barley, corn, and rye, all grown and harvested in Nova Scotia. With this gin I got less anise on the nose, but you can definitely pick out the juniper which is then followed by a lighter earthy smell. As far as palate goes the juniper is the first thing I pick up, followed by a slight pepperiness and bright citrus. I found the finish on this gin to be a little bit short, I am left with the taste of juniper and a little bit of licorice.


Everything you want to know about the history of gin

The history of gin is a long and complex one, of which I will only be covering a very small portion. If you are interested in a more in-depth read, I would highly recommend both The Curious Bartender’s Guide to Gin, or The Curious Bartender’s Gin Palace, both written by Tristan Stephenson.
The majority of people are only aware of a single type of gin, the London dry, because of this it is a common misconception that gin originated in England. This is not the case, in reality “gin” originated in Holland but under a different name. Gin was originally known as genever or jenever which is the French word for Juniper. Genever was a common replacement for wine during poor grape harvests, during these difficult harvests wine became scarce and expensive, the majority of which was reserved for aristocratic families who could afford such a luxury. Due to the limited wine production other forms of alcohol began to emerge, namely beer and grain-based distillate. Barley was the grain of choice for the production of genever because it was a very hearty grain with high yields as well as a very high sugar content which was perfect for fermentation and later distillation.
The London dry style of gin didn’t come around until the early 1570’s during the Eighty Years’ War when many residents fled to Holland and the boarders of Germany and others into England. During this time there was a lot of contact between Dutch and English soldiers. This led to many English soldiers developing a taste for genever, also know as “Dutch Courage”, although many people are familiar with the phrase “Dutch Courage” they don’t always know its origins. English soldiers were amazing by the fearlessness of their Dutch counterparts and soon realized it was because the Dutch soldiers were taking swigs from hip flasks before charging into battle. It was soon realized that what they were drinking was genever as it was thought to steady their nerves and give the soldiers false confidence. After the war ended the soldiers returned to England and this is when we saw the development of London dry gin. The term gin simply came from a translation error because the English soldiers could not pronounce genever and therefore shortened it to gin. They also didn’t fully know what botanicals were used in the production of genever which lead to the birth of London dry gin. But more on how the flavour profiles of these gins differ later.
At the turn of the 18th century the gin boom was in full swing. Gin was the drink of choice for many lower-class people because it cost the same as beer but had a much higher alcohol content making it cheaper and easier to get drunk on. Now it is important to note the “gin” that I am referring to here is not the gin we have today, our understanding of fermentation and distillation has come so far from what was understood in the 18th century. Even the types of still used for gin production have changed since then, the gin produced during this time was made from very high proof, low quality neutral spirit that needed to be heavily flavoured with botanicals to mask the unpleasant flavour of the spirit itself. It got to the point where many gin manufactures were using pine tree resin instead of German juniper to reduce the cost of production; and this was one of the better ingredients added to gin. Over the years and as demand for gin continued to increase manufacturers began cutting more and more corners to keep up with sales. To give you an idea as to why gin became so popular it was because it was cheaper than most necessities such as bread, vegetables, and especially meat, it made life for the lower class barrable simply by providing them with an affordable escape to those living in the slums of London. Gin was cheap, assessable, and highly addictive. Unfortunately, it was also quite poisonous in large quantities, when consumed in large quantities over an extended period of time it was known to cause blindness, loss of feeling in hands and feet, death, and in some cases the loss of one’s mind. This is when many derogatory names became associated with gin, these names included a mother’s demise or a mother’s ruin, blue ruin, and the devil’s left hand.
It took a very long time for the government to get involved with the gin craze and it actually wasn’t until 1720 that we saw any real acknowledgement from the government in regard to the detrimental effects of gin in the slums of London. Over the next 30 years we saw six gin acts put into place, the majority of which focused on regulating the production and distribution of gin. The main focus of these acts were on licensing and taxation, these acts were meant to limit those who were allowed to produce gin, fines were set into place for those drinking in the streets and for produces who cut corners during production. These acts also lead to workhouses and prisons being forced to stop serving gin to those living there. As these taxes and regulations began to be enforced many of the small-scale producers where squeezed out of the industry because they could not afford the licensing or to produce under the new regulations. As the small producers started closing down and larger producers started paying more in taxes as well as for ingredients the cost of gin started to rise. Many low-income people were forced to go back to drinking beer and porter because they could no longer afford gin.
However, this was not the end of gin in England, in fact with these more rigorous regulations the quality of gin skyrocketed which helped to rebrand gin as a gentleman’s drink. With this new type of clientele, the price of gin increased, this is when we started seeing gin palaces pop up. These where very extravagant bars where people of all social classes would gather around the bar where there were many gins to choose from. Barrels lined the walls, as did taps and bottles, all prepared to pour a shot of gin to whomever had the money.
There is considerably more history surrounding the evolution of gin, but I feel as though this gives you a good introduction and highlights the general trajectory of gin throughout the ages.


A Beginners Guide to Pairings

When it comes to pairings I feel as though a lot of people get overwhelmed and worry that they will pair the wrong things, I know when I first started, I felt that way. Making good pairings does take time and experience but hopefully this little guide will make you feel more confident and inspire you to start experimenting with flavor pairings.
When it comes to food pairing it is very important to keep in mind the six types of tastes we experience, bitter, sweet, salt, fat, umami, and sour. Along with taste we often experience a texture or sensation with these and that is also an important component to an excellent flavor pairing. For example, sour will cause a puckering sensation whereas fat will have a more luxurious and coating effect. The two ways of paring food I am going to discuss here are common flavor profiles and complementing flavor profiles. There are far more scientific ways to form pairings, but I will wholeheartedly admit I am nowhere near skilled enough to use or explain the more scientific side of food pairings. I want this little guide to be accessible and easily utilized because when you start pairing foods and spirits or cocktails you will be able to further appreciate both, and it really does open up a world of possibilities. I found from my own experience many food pairing articles focus on wine and are also very complex, I wanted to simplify it a little bit and offer a bit of a crash course for those who don’t want to spend hours sifting through information.
Before I get into actual pairing suggestions here are a few general guidelines to follow but bare in mind everyone’s palate is different and rules are not always meant to be followed. The best way to find out if something works is to experiment!
When pairing food you always want to consider how sweet or salty your pairing is, if you serve a very sweet spirit or cocktail with something with a high salt content it will make your drink taste very sweet and your food very salty which is not always a good combination. By doing this, you can also lose some of the more subtle or nuanced flavors. If you are working with a salty food such as cured meats or a salty cheese, such as parmesan or feta, you will most likely want to lean towards something that is less sweet. I personally like to pair salty foods with something more botanical or bitter because the salt works to heighten the more subtle flavors, for example vermouth or amaro would be a good choice. Salt also works to reduce the tannins in these types of spirits which causes them to feel richer and smoother.
More acidic foods should be paired with more acidic cocktails because if they are paired with low acidity it can reduce your ability to taste sweeter, fruity notes. However, when paired with something more acidic it can actually heighten fruity flavors. More acidic cocktails also pair well with fatty foods as the acidity helps to cut through the fat and causes flavors to be more prominent, vice versa for a fatty cocktail and acidic foods.
When it comes to more savory or umami cocktails you want to avoid extremely bitter or acidic foods because these flavors will become more prominent. If you wanted to pair say a vermouth with a savory food, I would choose either a light French style vermouth, such as Bianca from DeVine or Dry Vermouth from Esquimalt Wines, or a bittersweet vermouth such as the one from Odd Society. These vermouths contain minimal tannins and enough sweetness to not result in a pairing that is too bitter or acidic.
Well those are the basic guidelines for pairings, now let’s talk common and complimentary flavor profiles. To start let’s discuss common flavor profile pairings, this is pretty straight forward and a good place to start if you are learning. Common flavor profiles are self-explanatory, if you can taste cinnamon or smoke in a cocktail you can almost always pair it with something else that has those flavors.
For example:
I paired a Maple Whisky Gouda made with pasteurized cows’ milk from Holland with two cocktails, sugaring off and Kilt Lifter. This Gouda is a firm cheese with complex flavors of wood, spice, a slight nuttiness, and a rich sweetness from the maple syrup, the texture is very creamy and dense texture, so it coats your mouth and has a long-lasting texture and flavor. I wanted to create a cocktail that really highlighted these elements, so I eventually landed on two different types of cocktails with the same whisky base. I wanted to use the Ancient Grains Alternative Whisky from DeVine because it mimicked all the flavors found in the Gouda. Ancient Grains has a flavor profile of candied fruit, macadamia nuts, warm spices, and a very slight smoke and wood note. The first cocktail, sugaring off, uses Ancient Grains whisky, maple syrup, lemon juice, bitters, and an egg white; each ingredient serves a purpose. The whisky adds the wood, spice, and smoke notes, the maple syrup add a bit of sweetness as well as a rich caramel note, the lemon helps to cut through the richness of the cheese, the bitters add complexity and ensures the cocktail is not too sweet, and the egg white gives the cocktail an airy foam which pairs well with the dense texture of the cheese. Whereas the kilt lifter takes a different approach, this cocktail uses ancient grains whisky, again to bring notes of wood, smoke, and spice, Birch liqueur with notes of molasses, pecans, and spice, both pecan and aromatic bitters to once again add complexity, reduce sweetness, and bring in more nutty notes.
Another cheese pairing example is a beautiful Black Pepper Caciotta made with pasteurized cows’ milk in Salmon Arm. This cheese is semi firm with flecks of fresh cracked black pepper throughout the rind, the semi firm texture lends itself to a softer yet elastic feel, it can be served alone or made into fondue. Due to the element of black pepper there is a nice spice to the cheese as well as a balancing salt content, so to pair with this cheese I wanted a cocktail that would highlight the spiciness of the black pepper but would not be too sweet because that would make the cheese seem saltier. I eventually settled on the sipper which once again uses ancient grains whisky for a warm spices and wood flavors, bittersweet vermouth to add a botanical and herbal note, nocino for nuttiness, spice, and a slight sweetness. With this cocktail I really wanted to highlight the black pepper in this cheese because it is such a unique addition that really makes this cheese.
With complimentary flavor profiles there aren’t necessarily the same flavors found in both the food and cocktail pairing yet the flavors are still complementary. With these pairings you usually want to focus on highlighting certain flavors.
For example:
With this particular pairing I wanted to highlight the tanginess of the sheep’s milk and the flavors found in the rind. I paired Fleur Du Maquis, a semi-soft French cheese made from pasteurized sheep’s milk and rolled in various flowers and herbs. This cheese has a creamy texture with a slightly sour or tangy flavor from the sheep’s milk paired with notes floral and botanical notes as well as a slight citrus and nutty note. For this pairing I wanted to highlight the more floral notes of this cheese as that is what makes it unique, to do this I chose a pear-based cocktail. The cocktail is A-pear-tif and includes Poire William to highlight the floral notes, white dry vermouth to add a slight acidity as well as more herbal notes, and finished off with sparkling pear juice to bring out the tanginess of the sheep’s milk and to help cut through the richness of the cheese to better appreciate the flavors of both.
Another example of both complementary and common flavor profile pairings would be pairing Love or Confusion with a dense chocolate cake. Love or Confusion is made using barrel aged genever which is the love child of gin and whisky with a botanical forward opening that evolves into a more caramel and spice finish, ginger liqueur adds a bit of spice and furthers the complexity, Campari adds bitterness to counter the sweetness of the cake, dark coffee heightens the richness of the chocolate, and both the aromatic and chocolate bitters work to add complexity and herbal notes that highlight the botanicals in the gin. This cocktail and a good chocolate cake are a match made in heaven!
The most important thing to remember when it comes to pairings is to try different things and understand that everybody has a different palate. There really are no right or wrong pairings if it is something you like, just keep experimenting with new flavors and combinations. If you are ever stuck on a cheese pairing I would suggest going to your local cheese monger, for me that Perseval & Young here in Kelowna, they are incredibly knowledgeable and always willing to describe the flavor profiles of the cheeses in stock. If you are in Victoria I recommend checking out Charelli’s for their amazing assortment of meats and cheeses.


Hand Foraged Liqueurs
Since spring is here and summer is right around the corner it is the best time to forage for some local ingredients to add to your cocktails. I have already posted a lilac simple syrup recipe over in the “syrups & mixers” section of recipes. But here I am going to give you two recipes for sustainably harvest liqueurs, one features stinging nettle, and the other features both watercress and lilac.

Stinging Nettle Liqueur
Stinging nettle might seem a little intimidating and it is definitely deserving of that reputation so when harvesting nettle ensure you wear appropriate clothing. You will want to wear jeans, long sleeves, and thick gloves. I wore gardening gloves with rubber palms to really protect myself. When harvesting my first batch I was very careful and didn’t get stung at all, I was very impressed and got cocky when I stopped to pick some more and got stung all the way up my arm. Then when harvesting the watercress I didn’t realize there was stinging nettle beside me and proceeded to stick my face in it, I don’t recommend doing this. Heed my warning and dress appropriately, however, if you should find yourself with a sting there are normally docking leaves nearby that you can rub on the stung area that will neutralize the sting.
As far as actually harvesting the stinging nettle you really only want the “young” leaves, these tend to be softer and less bitter. A good rule of thumb is to only harvest the top 6 inches or so of the plant, or the top three layers of leaves. Not only are these the young leaves you want but it will promote further growth of the plant.
For the orris and angelica root I bought them dried from The Silk Road Spice Merchant based out of Calgary. They have an amazing selection of various herbs, spices, bitters, salts, and acidulants.
Ingredients
1/2 tsp Dried Angelica Root
1/2 tsp Dried Orris Root
About 1 Cup Stinging Nettle Leaves
1/2 Cup Sugar
Rind of 1 Lemon
375ml of Vodka (I used Sons of Vancouver)
Method
The first thing you will want to do is remove the nettle leaves WITH your gloves on from the stems, then place all your nettles in a large bowl and pour over hot water and let sit for 5-10 minutes. Not only will this clean all the leaves it will also deactivate the stinging properties of the nettle. After the nettles have been cleaned and steeped, drain and place them on a towel, at this point the nettles should be fine to touch but I would still recommend using caution.
Take all your ingredients and place them in an airtight container, I find Tupperware containers work really well here. Give the mixture a good shake and leave it in a cool dark place for 1-3 days, and shake it 3-4 times a day. How long you steep it will depend on personal preference and how strong you want the flavour, I found after two days I liked the flavour the best. I taste test it as time goes on until I like the flavour. The only thing you want to make sure is that all the sugar is dissolved.


Watercress Liqueur
Watercress grows in clear, fresh, slow-moving waters so creeks and mountain runoffs would be a great place to look. I got lucky and have a stream right in my neighbourhood where watercress grows, so I just headed down the hill and harvested myself some. To harvest watercress, you want to stick your hand in the water and find where the plant attaches to the ground and then cut a few centimetres above that. Watercress is a perennial, meaning it will come back year after year, so you want to make sure you leave the roots. In most places, watercress will grow year-round, here the winters are a little bit frigid so the plants tend to produce less in the winter in the Okanagan. The best time to harvest watercress is during the fall and spring.
Ingredients
1/2 Cup White Sugar
About 1 Cup Watercress
About 3/4 Cup Lilac Flowers
Rind of 1/2 a Lemon
375 ml Vodka (I used Sons of Vancouver)
Method
Just like the nettle you want to soak both the lilac flowers and watercress in warm water, gently agitate them to remove any unwanted debris, once they have soaked for 5-10 minutes strain them on to a clean hand towel to drain. At this point you can start removing the lilac flowers from the stems, just pinch the head of the flower or bud and gently pull.
Once the flowers are off their stems take all your ingredients and place them in an airtight container, I find Tupperware containers work really well here. Give the mixture a good shake and leave it in a cool dark place for 1-3 days, and shake it 3-4 times a day. How long you steep it will depend on personal preference and how strong you want the flavour, I taste test is as time goes on until I like the flavour. The only thing you want to make sure is that all the sugar is dissolved.


All About Fat Washing

Fat washing is a fairly simple way of making your cocktails more interesting and a way of adding more dimension in the form of both texture and flavor. Fat washing adds a decadent richness to any cocktail as well as the flavor of whatever fat you chose to use. As far as fats go you can essentially use anything you want from peanut butter, almond butter (any peanut butter alternative), coconut oil, bacon lard, sesame oil, avocado oil, normal butter, caramelized or browned butter, it’s up to you. in more detail, this is just the quick and dirty version.
The type of fat you choose is dependent on what you are trying to achieve by doing this, do you want a certain flavor? Or is it more about the texture?
Before you start fat washing anything think about how strong the flavor is, for fats like bacon lard, peanut butter, or sesame oil the flavors are quite strong so take that into consideration when you are fat washing. For flavors like these I tend to reduce the fat to spirit ratio, it takes a bit of playing around with to find the ratio that you like the best. When using fats like bacon lard or peanut butter the flavors tend to be very prominent so you need to pair it with something that can “stand up” to them so ensure that you have an idea as to what you want to pair with your fat washed spirit. On the oil side of things, I find coconut oil does add a really light beautiful coconut aroma to the spirit, whereas avocado oil and olive oil adds less flavor but still gives you the very silky luxurious texture you expect from fat washing.
Enough talking about fat washing and more discussion on how you actually do it:
For the majority of these fats, the ratio and method are the same, however, I have listed a few others down below that differ in ratio or method or both. These are the ratios that I have found work but please tweak them as you see fit for what you are making!
Ingredients
1/2 Cup Fat
1 Cup Spirit
Method
If your fat is a solid at room temperature like coconut oil is you will need to melt it, you can do this in the microwave or on the stove. For other oils like olive oil, you can skip straight to this step. Pour your fat and spirit of choice into a large Tupperware container and give it a good shake or stir. You do not want to add the fat into your spirit bottle at this step because it makes it harder to get the fat out later (trust me). Set aside your fat mixture for at least 30 minutes then transfer it to the fridge so the fat firms up. After an hour the fat should have floated to the top and formed a hard layer, break this into pieces, and remove. Once all the fat has been taken out you can run the spirit through a coffee filter if there are any remaining fat chunks or sediment. I don’t usually find I need to strain or filter the spirit; it is up to you.
Bacon Fat
Salt content is also something to take into consideration, I find saltiness comes out when fat washing spirits so if possible, I suggest using low sodium options.
Ingredients
1/4 Cup Fat
1 Cup Spirit
Method
If your fat is a solid at room temperature like bacon fat is you will need to melt it, you can do this in the microwave or the stove. After the lard is melted, I like to pass it through a fine strainer just to take out any residual pieces of bacon or burnt bits. Once everything is strained out, pour your fat and spirit of choice into a large Tupperware container. You do not want to add the fat into your spirit bottle at this step because it makes it harder to get the fat out later (trust me). Shake your spirit and fat mixture and set aside for about 30 minutes then transfer it to the fridge so the fat firms up. After an hour the fat should have floated to the top and formed a hard layer, break this into pieces, and remove. Once all the fat has been taken out you can run the spirit through a coffee filter if there are any remaining fat chunks or sediment.
Nut Butter
Salt content is also something to take into consideration, I find saltiness comes out when fat washing spirits so if possible, I suggest using low sodium options.
Ingredients
1 Cup Nut Butter
1 Cup Spirit
Method
Nut butter is slightly different from other fats in that they are not solid at room temperature or after being refrigerated and therefore won’t form that hard layer of fat on top of the spirit that makes it easy to remove. So, this technique requires a glass casserole dish and a bit more time. If you are using an all-natural nut butter drain off all the oil that sits on top and just use the underneath layers. Spread a thick layer of the nut butter on the bottom of the casserole dish, I find for this method measurements don’t matter as much so measure the nut butter with your heart. Once you have a layer of nut butter pour over your spirit of choice and tightly cover it with plastic wrap or a lid if you have one and let it rest for 2 days. Once your spirit has rested for two days strain it through a coffee filter to remove any sediment and pour back into the bottle for immediate or later use.
The nut butter can be saved and added to anything that you don’t mind a bit of an alcoholic kick in, I highly recommend making chocolate chip cookies with the boozy nut butter to pair with your new cocktail.
Brown Butter
Ingredients
1/2cup unsalted butter
1 cup spirit
Vanilla and spices (optional, but delicious)
Method
Take your butter and heat it in a pan over medium-high heat, once it is completely melted continuously stir it. Eventually, you will notice the butter going more caramel in color which is exactly what you want. This process happens quite quickly now so keep an eye on it, once the mixture reaches a rich dark caramel color immediately remove it from the heat and pour the butter into a tub and add the spirit. This will stop the butter from continuing to cook and burn. At this stage, you can add other flavorings such as vanilla or various spices depending on what flavor profile you are going for. Put the lid on the tub and give it a shake, leave this mixture at room temperature for at least 30 minutes then transfer it to the fridge to form the hard layer of fat. Once the layer of fat forms on top of the spirit remove it and pass the spirit through a coffee filter to remove any brown butter sediment.
The brown butter can be used for a number of different things. I mix mine with a little bit of honey, cinnamon, cloves, and allspice to spread on pumpkin or banana bread. You could also add some sage to it and make a beautiful sage brown butter sauce for pasta. The possibilities are endless.


Various Types of Foaming Agents
The most common way to get a nice, rich, creamy foam on cocktails is to add an egg white to the mixture. What if you’re vegan, allergic to eggs, or just don’t have eggs in the house. There are a few other options for creating an amazingly creamy cocktail without the use of eggs. Here I tested three different types of foamers so you don’t have to. I tried to be as scientific as possible here, but bear in mind it has been awhile since I have been in a science class. All the cocktails were made using the same cocktail recipe and were shaken for the same amount of time with the same number of ice cubes. They were then blind tasted by a willing participant and myself to discuss texture, flavour, visual appeal, and of course the overall quality of foam.
The three emulsifiers tested are egg white, aquafaba, and Ms. Betters Bitter’s Miraculous Foamer.

Egg White
As previously stated, egg white is the default for creating foam in cocktails, most cocktails call for one egg white or 1oz, that is what was used for this test.
Visual
Funnily enough out of the three cocktails this one was the least appealing, I found the egg white distorted the colour of the cocktail and made it seem muted. As far as the foam looked it was nice and white, seemed to be both dense and creamy. I found this foam looked like the foam you would find on top of a freshly poured beer.
Flavour
For this section I am not taking about the flavour of the cocktail so much as I am talking about how each emulsifier affects the flavour of the cocktail. With the egg whites I found nearing the bottom of the cocktail there was a slightly metallic taste like the taste of meringues.
Texture
The texture of the foam was very light and airy which was interesting because it looked denser than it ended up being. However, even though the foam was light and airy the egg whites gave the cocktail a very lovely, creamy mouthfeel.
Overall Thoughts
You can see why this is the standard emulsifier for foamy cocktails, egg whites are cheap and easy to access the results a very good and consistent. The only downside is egg whites are not as shelf-stable as other alternatives and they are not suitable for those who do not eat animal by-products.


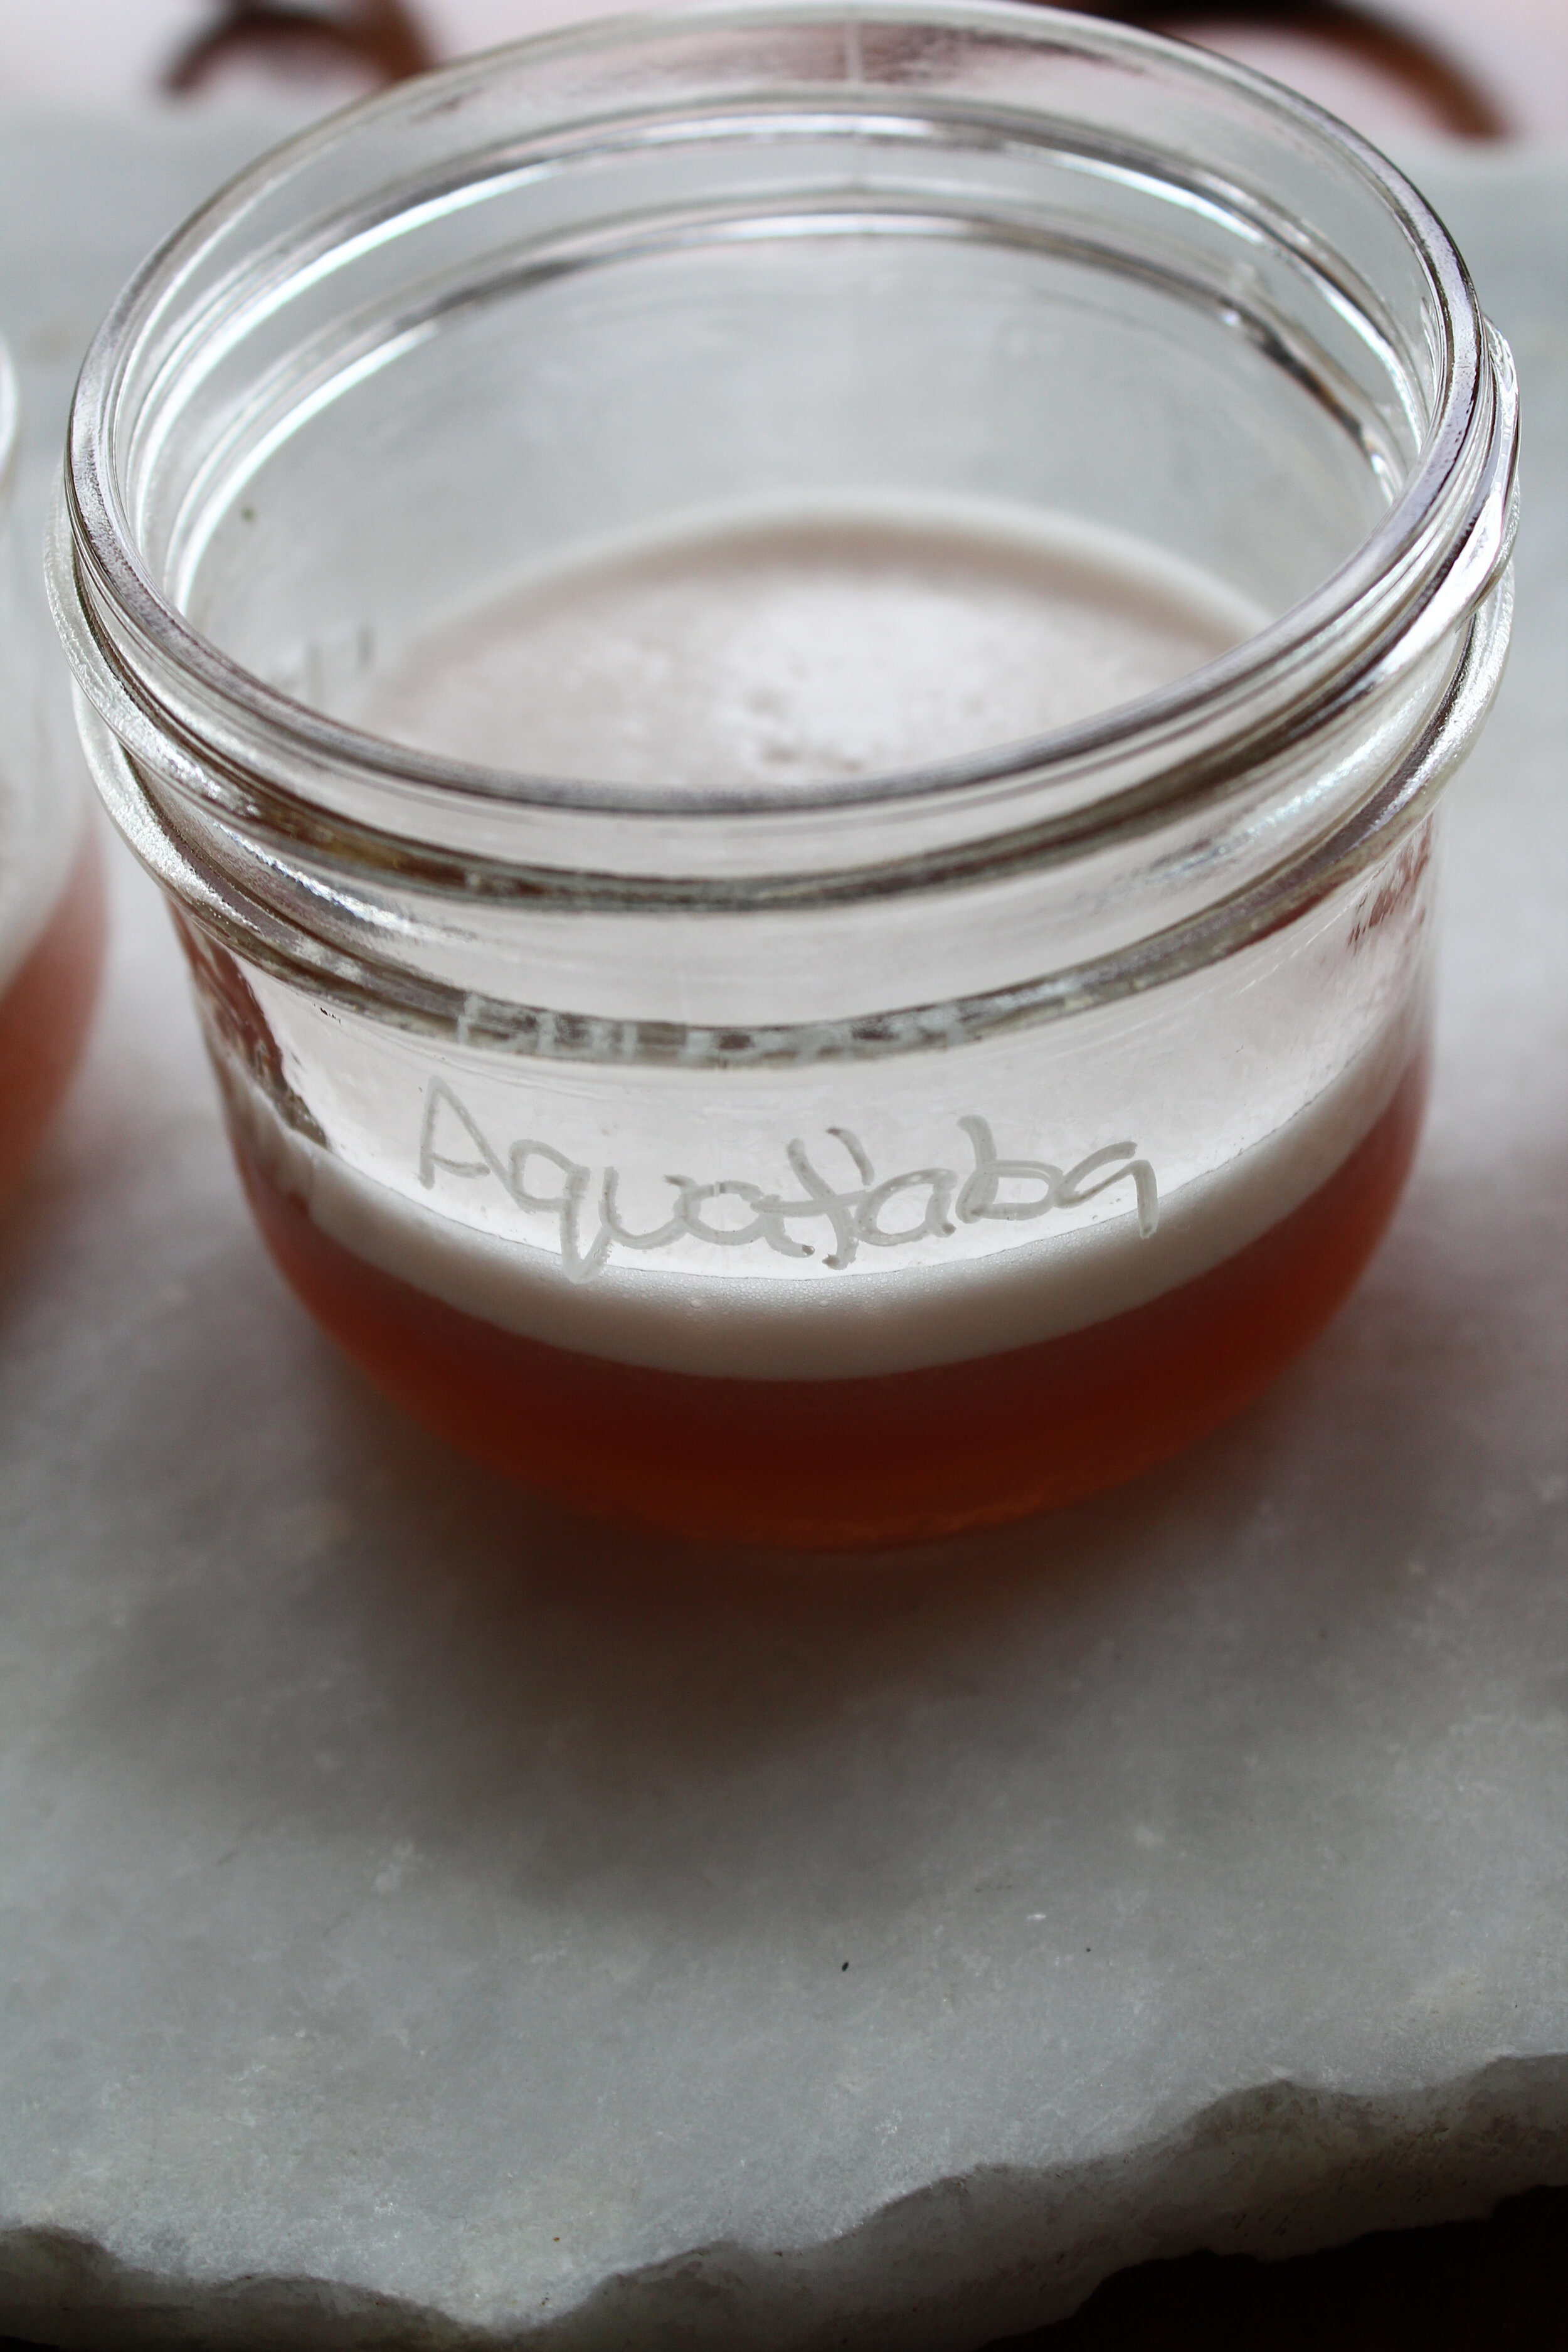
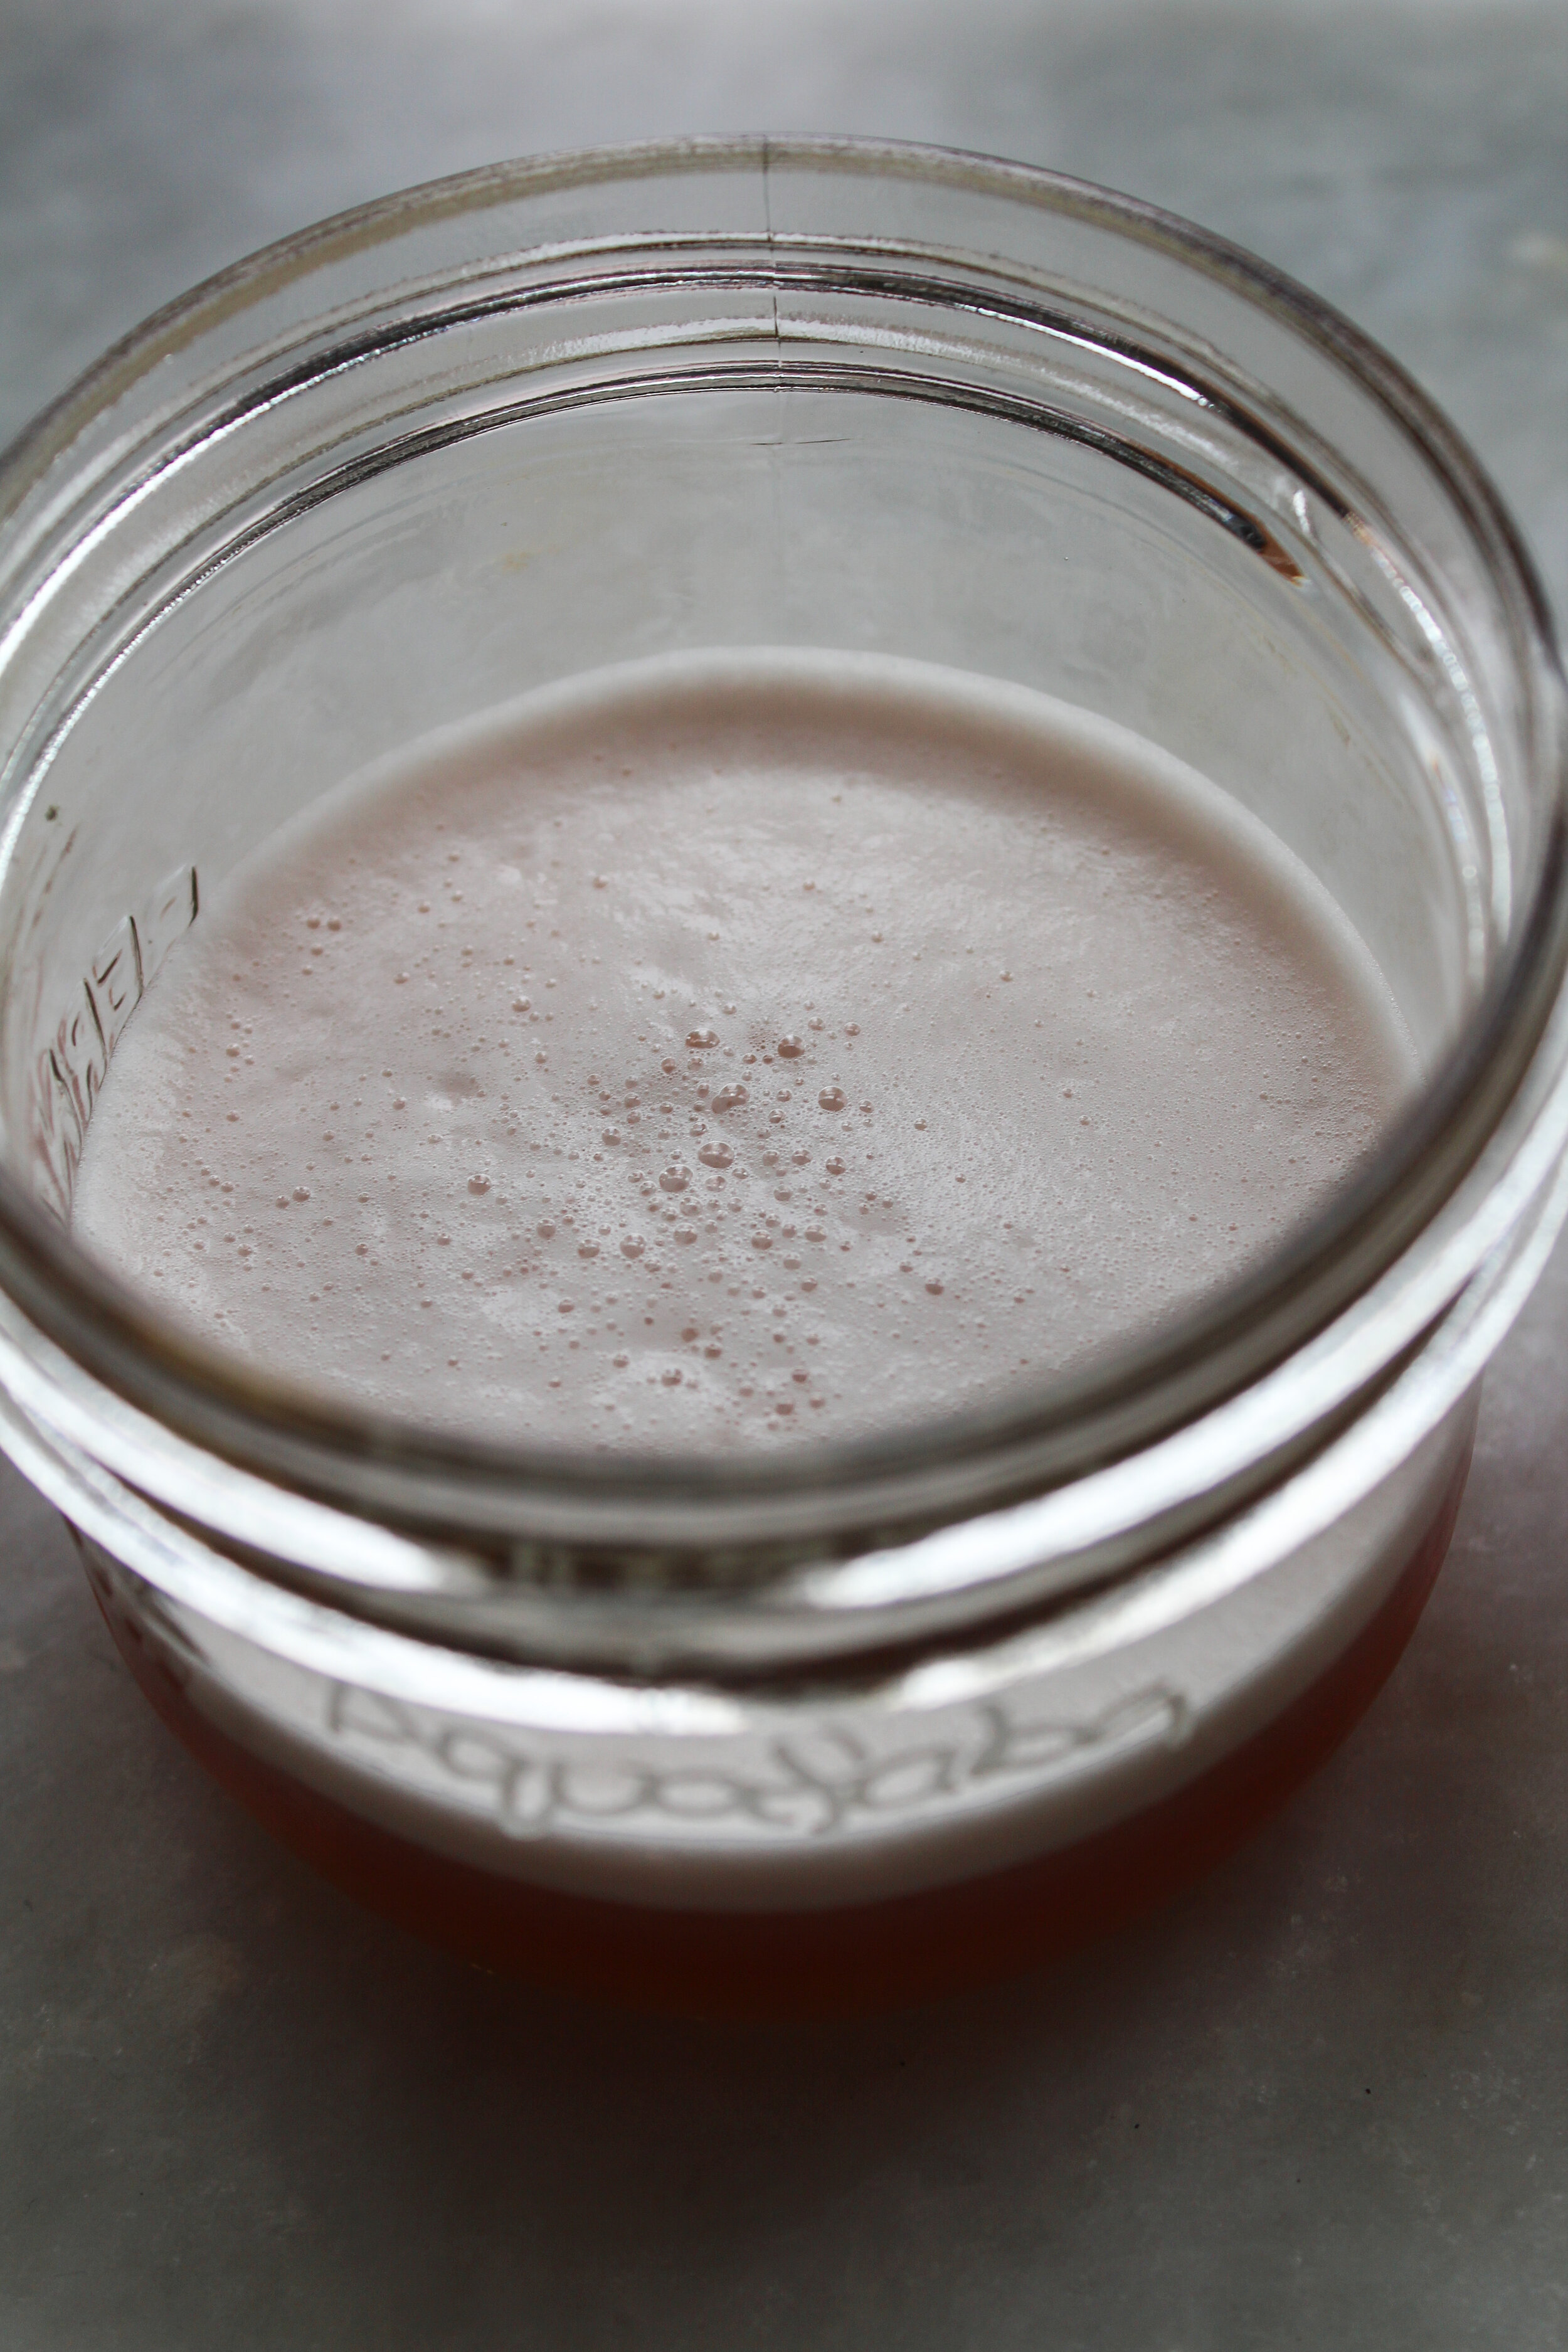
Aquafaba
Aquafaba was not something I had heard of before doing some research on foaming agents, it sounds fancy, but it is actually just the liquid you get out of tins of cooked chickpeas. You can make your own by cooking chickpeas and collecting the resulting liquid, but I found it easier just to drain a tin of chickpeas. I used 1oz of the liquid per cocktail and that gave very good results and can be used as a direct replacement for egg whites because it is the same volume of liquid.
Visual
The aquafaba altered the colour of the cocktail a little bit, but not nearly as drastically as the egg whites. The colour of the cocktail ended up being slightly more muted but still a lovely pink colour. The foam here was, in my opinion, the nicest looking foam. It was a very bright white, and looked very dense with very few large bubbles. It had a very consistent look across the whole top of the cocktail.
Flavour
When using the aquafaba there was a slight earthy smell to the cocktail, but it was not at all unpleasant, I actually found I liked the smell and it added another dimension to the cocktail. The earthy smell did not affect the flavour of the cocktail at all which I was worried about, I thought using aquafaba would make my cocktails taste like bean juice, but it didn’t at all.
Texture
The texture of the cocktail was very velvety and luxurious, the foam was quite dense but did not have the thick meringue texture you get from egg whites. I found the aquafaba foam lasted the longest, it did not dissipate over time, and large bubbles did not form as much as they did with the other foaming agents.
Overall Thoughts
I went into the aquafaba test a little hesitant because I was worried it would taste like beans and not have the same foaming affect as egg whites, however, I was very wrong. Using aquafaba produced fantastic results and performed the same, if not better, than egg whites. I would highly recommend using aquafaba whether or not you are looking for a vegan substitute.
Ms. Betters Bitter’s Miraculous Foamer
Visual
Ms. Betters Bitter’s foamer had the least effect on the colour of the cocktail and resulted in a very vivid colour. However, I found that this cocktail had the least amount of foam and the foam was quite sparse and had large bubbles.
Flavour
This foamer leads the cocktail to have an almost sour herbal smell that I could taste throughout the cocktail. However, my tasting associate did not have the same complaints and found that there was no real flavour imparted on the cocktail from the foamer. I suppose it depends how sensitive you are to the botanical mixture used to create this foamer.
Texture
The texture of this cocktail was not hugely impacted by the foamer due to the small amount used, the recommended amount per cocktail is 1/3 of a dropper, therefore there is not a lot of texture difference in the cocktail. The foam of the cocktail was very velvety and airy, however, I found it was quite sparse and not very thick.
Overall Thoughts
I personally did not find this foamer as effective as the egg whites or aquafaba and is not one that I would personally use. Especially in a cocktail with a light flavour profile where the sour herbal flavour may be more noticeable.
However, I have found the best use for this foamer is to use it in conjunction with egg whites or aquafaba. When used together the results are a very dense, creamy, velvety foam that does not dissipate over time. I almost always use Ms. Betters Bitter’s foamer to get a better foam on my cocktails, I use the normal 1oz of either aquafaba or egg whites per cocktail and then add in 1/3 of a dropper of Ms. Betters Bitter’s foamer as well for the best results. Using this method is when I get the most positive feedback on my cocktail foam.


The Tools of the Trade
When you watch bartenders at fancy cocktail bars or scroll through instagram you might think you need a bunch of fancy tools and toys to make cocktails, but you really don’t. Here I am going to talk about what tools are handy to have when you’re interested in cocktails and don’t mind spending a bit of money to deck your bar out. I am also going to cover good alternatives for those who don’t make cocktails very often or don’t have the money to spend on items they don’t really need.
Actual Bartending Tools
I am more of a minimalist when it comes to bar tools just because I don’t want to spend a bunch of time or money making cocktails and would much rather splurge on the spirits and other ingredients than the tools. My most used tools consist of
Stainless steel cocktail shaker
Fine mesh strainer
Jiggers
Pour spouts
A barspoon
Cocktail skewers
Peeler
Zester
Icecube tray
Juicer
Muddler
Hawthorne strainer (really only need if you are using a Boston shaker)
How to save money when buying these items
The only item here that I would suggest spending a bit more on is the cocktail shaker, if you get a cheap one they tend to leak, rust, break, and scratch really easily. This is coming from personal experience… so much personal experience. Also for the love of all that is good DO NOT BUY A GLASS SHAKER! I don’t care how cute it looks, they will break at the most inconvenient times and you will most likely cut your hand and waste good whisky.
You could go to a proper bartending store and drop 30-70$ on a shaker, it will be an amazing shaker but I personally am not at the point where I feel I need a 70$ shaker so amazon is a good alternative.
When it comes to all the other tools places like Winners and Homesense are good options for jiggers, strainers, and pour spouts. They are usually thrown in with kitchen gadgets or leading up to summer they will usually be in the seasonal section. If you are looking for a nicer quality or more specific style I would recommend kitchen stores, such as Ming Wo, Gourmet Warehouse, or House of Knives. These stores are also really good for juicers and better quality zesters. These options are definitely cheaper than bartending stores but we can still get cheaper! I personally love a good second-hand store, I have found so many vintage tools wandering around second-hand stores. You can usually score a jigger or barspoon for a few dollars which an absolute steal.
When it comes to icecube trays if you want some fancy shaped ones IKEA has some really cute ones like fish, flowers, hearts, and whatnot, and they are very reasonably priced. I have also always had good luck with finding large silicone ones at Winners and Homesense for reasonable prices as well.

Alternatives to Bartending Tools
First off a jigger is just a fancy name for a shot glass, all you have to figure out is if your shot glass is one or two ounces then you’re sorted. If a shot glass is still a little fancy for you one ounce is equal to 30 ml which is two tablespoons (15mlx2=30ml), so you can always just use normal measuring spoons. The same goes for barspoons, they are usually about 5ml or a teaspoon.
As stated above the one thing I would recommend spending money on is a cocktail shaker but if that is not an option there are ways to get around using one. Whether you don’t have the money to buy one or you’re just in a pinch Tupperware works surprisingly well. I forgot to bring my shaker on my Christmas vacation and like hell was I not going to make cocktails so I just grabbed a Tupperware that had a really tight seal and went on my merry way. For drinks that have foam, you might have to shake them for a little longer but other than that the outcome was very similar to that of a proper shaker.
Before I bought myself a real muddler I would just use the back of a wooden spoon or any other vaguely rounded item I had lying around and then just smush what ever I needed to smush. When it comes to juicers there is this new invention called hands, with these, you can just squeeze the fruit over a strainer to catch the seeds and call it a day. If you are going to use this technique roll the citrus fruit on your counter with the palm of your hand to release the liquid better, this will result in an easier squeeze and more juice.
For icecube trays, peelers, and zesters you can check second-hand or dollar stores for cheaper versions of them that will still give you similar results but without having to drop a ton of money on them.
Not everything needs to be expensive, I think sometimes we see all these fancy tools and assume we need them to make a pretty and delicious cocktail but that is not the case. You can usually find a way around spending money on bartending tools, it is much harder to find a way around spending money on the spirits though, unfortunately.
